App Store Connect Guidelines for App Developers and…
App Store Connect is the platform that lets you upload your app and manage all updates, including metadata, revenue details, […]
Published Aug 21, 2026
18 min

The most common Apple App Store rejection reasons are app crashes and bugs, privacy violations, metadata violations, and apps lacking minimum functionality. To fix these issues, you can test your app on multiple devices before submitting it for review, create a polished user experience for your users, and submit accurate metadata.
To better understand the App Store rejection reasons, in today’s article, we will dive deeper into the most common App Store rejection reasons, how to prevent App Store rejections, and how to appeal in case you feel your app was not correctly judged.

When you submit your app for review, Apple evaluates it to ensure it meets its quality, security, privacy, and functionality standards. The review typically involves Apple’s App Review team testing your app on real devices and verifying compliance with the App Review Guidelines.
During the review process, Apple verifies that the app works, follows App Store guidelines, does not contain misleading information, does not violate user privacy, and is not plagued by bugs. They have the choice to accept, decline, or place the app on hold for further review.
If your app is rejected, you’ll receive feedback explaining the issue. You can fix the reported problems and resubmit your app, or appeal the decision if you believe the rejection was made in error.
Now, let’s look at the most common App Store rejection reasons and how you can prevent them.
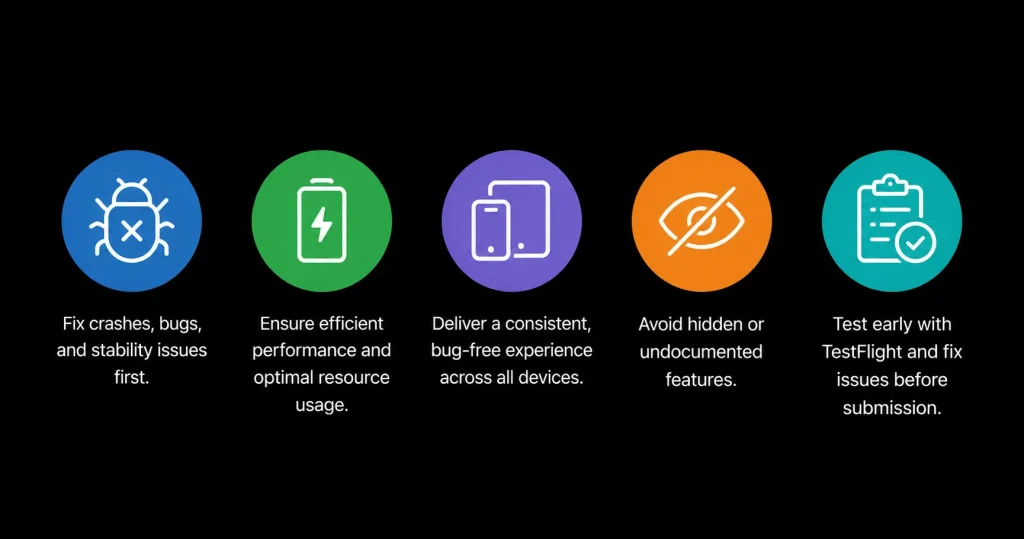
Technical and performance issues are the first things reviewers notice when they open your app. If the app crashes, has bugs, or exhibits stability issues, it is rejected right then.
Next, the app reviewers assess whether your app is designed for efficient use. If your app drains the battery quickly, causes the phone to overheat, or puts unnecessary strain on the phone, it’s likely to be rejected.
Another critical App Store rejection reasons is that your app does not provide a consistent user experience across devices. Apple tests your app by running it on both iPhones and iPads whenever possible and has the authority to reject it if it doesn’t function well on any device.
Another common App Store rejection reasons is the presence of hidden or undocumented features. The rule of thumb is that all your features and functionalities should be described in detail in the notes for review in the App Store Connect. Remember not to write generic descriptions, as they will be rejected.
The fix: The best time to fix technical or performance issues is before you submit the app for review. Test your app thoroughly with TestFlight before submitting it for review. Use beta testing to identify crashes, bugs, performance issues, and device compatibility problems, then fix them before submitting your app through App Store Connect.
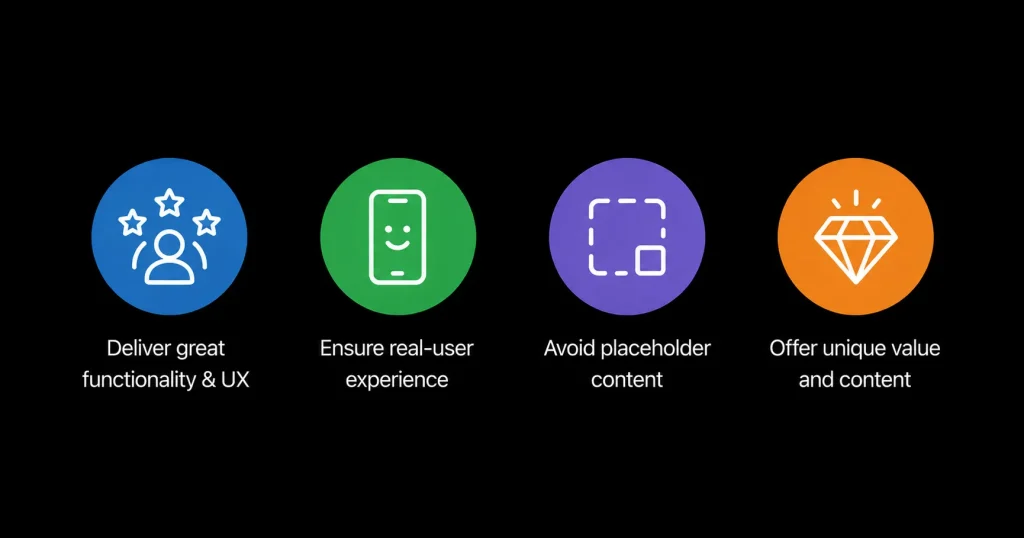
Once your app passes the technical and performance tests, the next step is passing the functionality and user experience (UX) review. Your app should offer lasting value through useful features, engaging content, or a high-quality experience. Apps with incomplete functionality, placeholder content, or minimal usefulness are likely to be rejected.
Apple tests your app on real devices to ensure it delivers a smooth and intuitive user experience. Apps with poor usability, broken flows, or unfinished features are more likely to be rejected during the review process.
Apps are frequently rejected for including incomplete placeholder content, such as unfinished text or missing screenshots, which fail to represent the final user experience. If you submit apps with placeholder content or missing information, then your app cannot be approved.
Finally, if your app doesn’t offer meaningful functionality or enough value to users, Apple may reject it for failing to meet its minimum quality standards.
The fix: Build an app that offers a high-quality user experience with complete, reliable functionality. Your app should not be a copycat of other app’s functionality and add little value beyond existing apps. You can use AppLaunchpad’s App Store Tracker to find good app ideas and create a better user experience to prevent rejections in the review process.
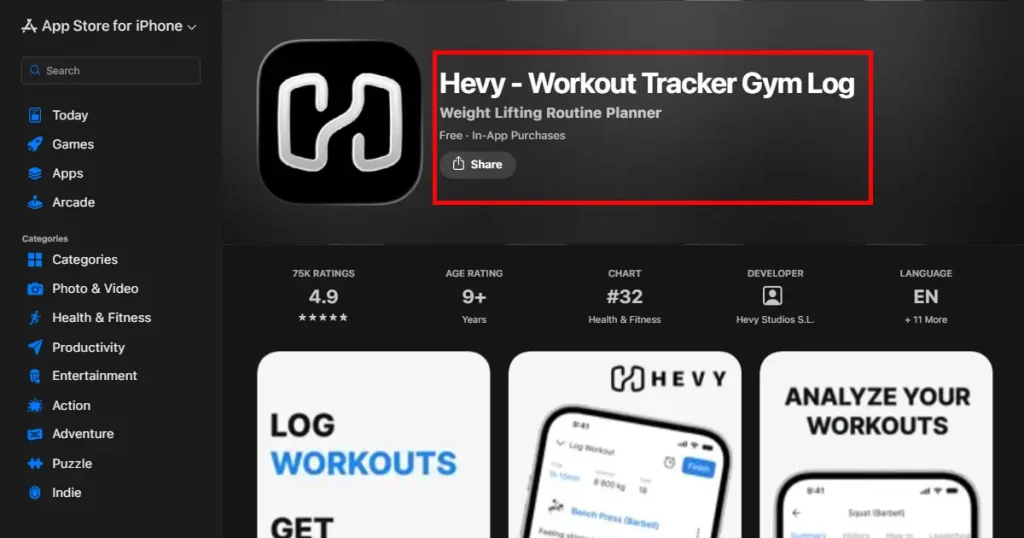
Apple App Store is very specific about giving its users complete information before they download any app. So, your app metadata, including privacy policy, app descriptions, screenshots, and previews, should accurately reflect your app’s core experience without any misleading information that sets the wrong expectations about your app.
App screenshots play a major role in giving users an insight into your app without downloading it, which is why your app should follow App Store screenshot guidelines and must feature real app UI. If it uses generic user pages like title art, login page, or splash screen without actual UI, then your app might not be approved.
You can use dedicated app store screenshot tools like AppLaunchpad to create store-compliant app screenshots quickly without advanced design tools.
Incorrect age ratings are a common App Store rejection reasons, as they mislead users and can even trigger government inquiries. Ensure your age rating is accurate.
The fix: Ensure that when adding metadata to your app, you showcase your app’s actual functionality in app screenshots and preview videos, answer the age rating questions correctly, choose a unique name for your app, and add keywords that accurately describe your app. Don’t add irrelevant keywords to your metadata in an attempt to rank your app higher in search results, as metadata review will remove them.
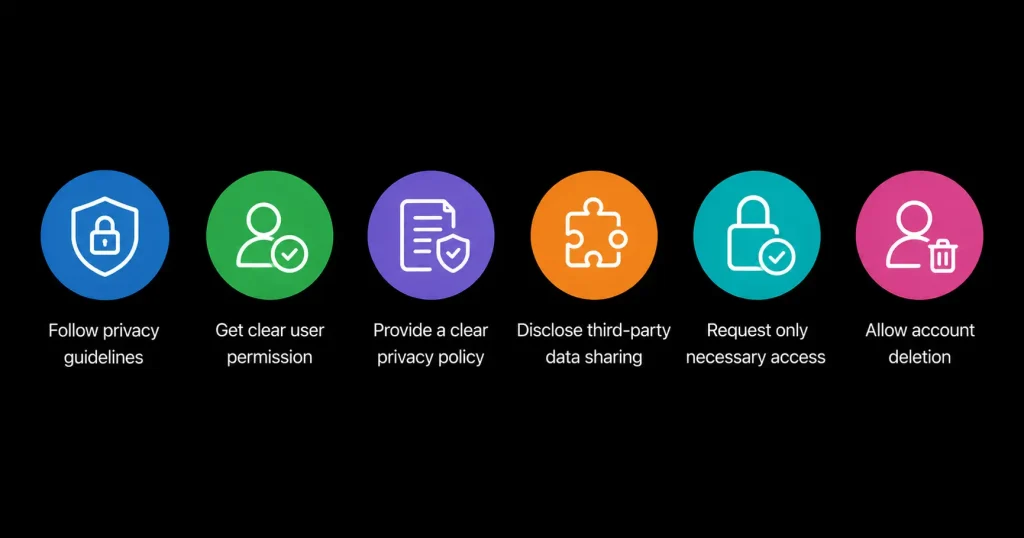
Apple App Store is known for its privacy standards, and if you don’t follow its privacy guidelines, then your app is more likely to be rejected. Your app shouldn’t collect any user information without asking for your permission first.
Another App Store rejection reasons is forcing users to grant permission by locking important information or features. If your app engages in any of these activities, it might be rejected and not even allowed to be resubmitted.
Follow Apple App review guidelines for best practices to ensure user privacy, include a Privacy Policy page within your app, and an App listing that clearly states what information you will need from the users once they download the app, and what that information will be used for.
The fix: Clearly disclose any third-party data sharing in your privacy policy and request only strictly necessary permissions; never pressure users to grant extra access. For apps with limited features, offer a no-login experience and provide an easy option for users to delete their accounts and data.
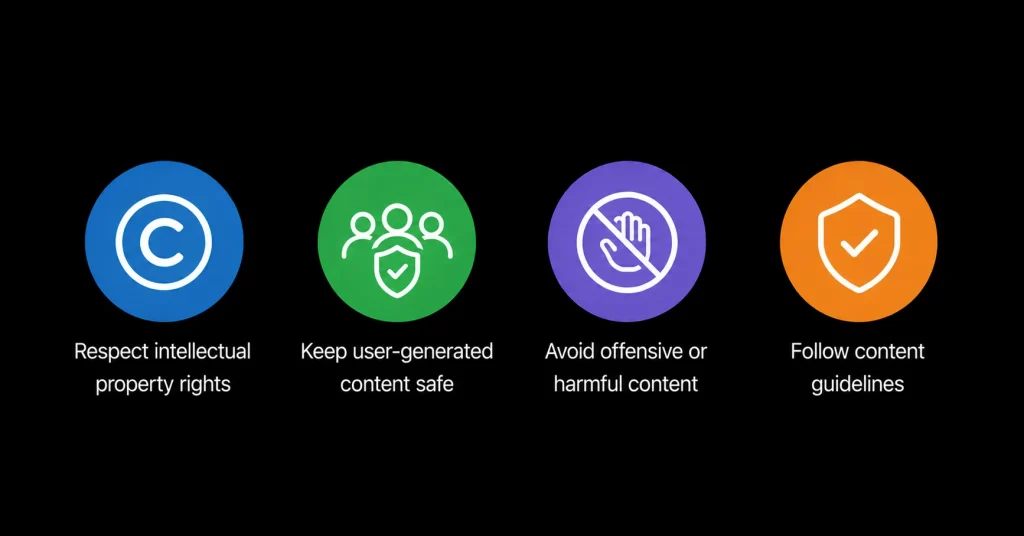
Apple App Reviewers also review the actual content in your app for any intellectual property violations. The most important being copyrighted content. If you don’t own a content piece like an image, text, or video, you cannot use it within your app.
If your app is like a social media app and contains user-generated content that is pornographic or NSFW, or supports bullying, the reviewers will work with you to make changes to your app to make it compliant with the app store. And depending on your response, they can remove your app from the app store.
Apple also rejects apps that contain offensive, defamatory, violent, or misleading content, or attempt to profit from sensitive events such as conflicts, disasters, or public health emergencies.
The fix: Read the Apple App review guidelines and follow best practices to keep your app users safe. Moreover, if your app consists of user-generated content, you should have a method to filter out objectionable content, report offensive content, and block users. It is one of the most common App Store rejection reasons for social media apps.
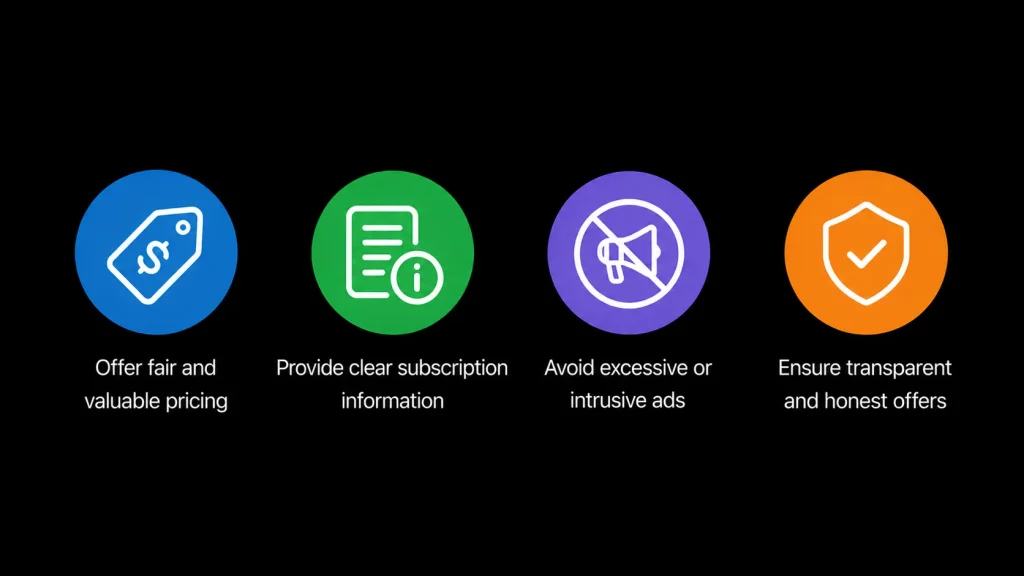
There are multiple ways to monetize your app on the App Store, and the most common is to offer a subscription. If your in-app purchases or subscriptions are misleading, deceptive, or don’t clearly explain what users are paying for, Apple may reject your app.
Before asking users to subscribe, clearly explain the value of the subscription, pricing, and included benefits, while avoiding excessive third-party ads. Frequent or intrusive advertising can make your app feel spammy and lead to rejection.
The fix: Instead of misleading or overpriced pricing, have transparent pricing, renewable terms, billing details, and cancellation information before a user subscribes to your app. Moreover, if you offer a free app and use ads for monetization, include small ads that can be skipped after a short period and ensure they don’t interrupt the user experience or trick users into accidental clicks.
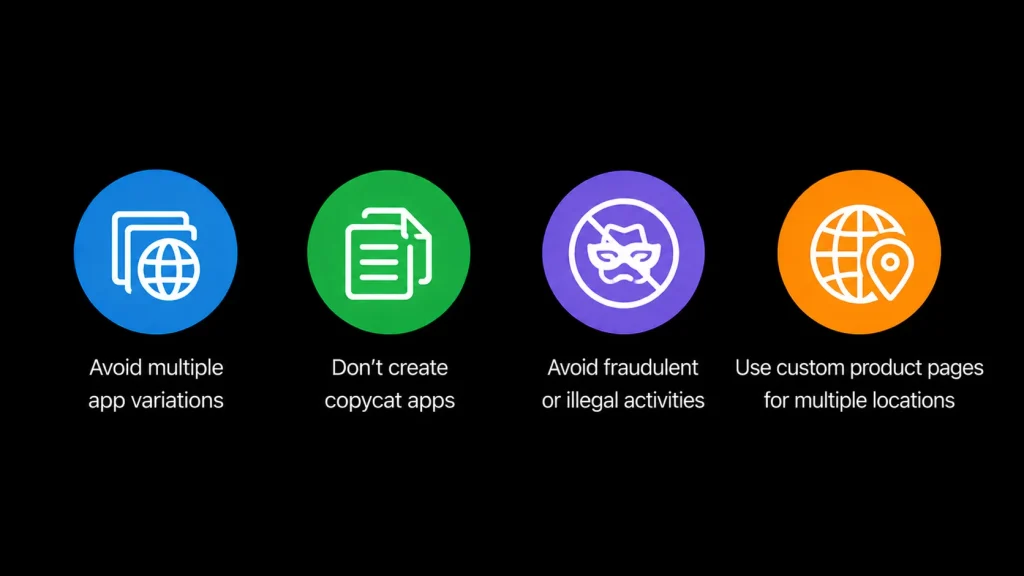
New developers mistakenly make multiple variations of their app with localized content and submit it for review, however it will get rejected because it would be counted as spam.
Apple also rejects copycat apps, especially those that replicate existing apps or charge for basic features like flashlights or wallpapers without offering meaningful value.
Moreover, another common Apple App Store rejection reasons is participating in fraudulent activities like offering pirated content through your app or promoting illegal services.
The fix: If you want to create and launch your app in multiple locations, you can use the custom product page feature of App Store Connect. And focus on creating unique experiences for your customers without using any fraudulent practices, as this will increase the likelihood of your app being approved faster.
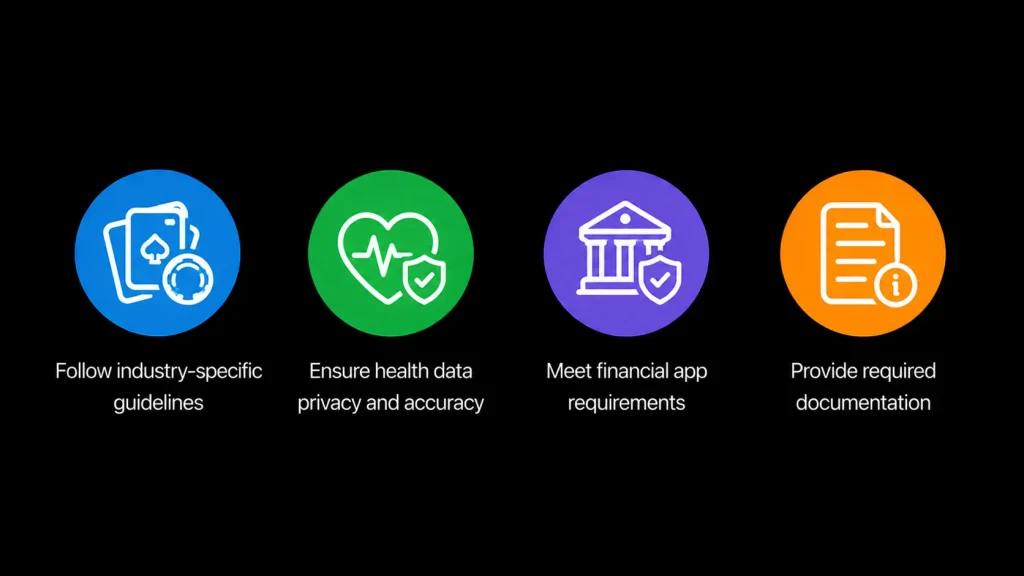
Now, the App Store also has specific guidelines for the industry your app operates in. If your app is in the gambling category, your app review time can be much longer than that of other apps, and it will be completely under Apple’s jurisdiction, whether they approve it or not.
Health apps must not add inaccurate data to HealthKit, share user data with third parties, or use it for marketing, as doing so can lead to App Store rejection.
Another such industry that Apple takes seriously is financial apps that allow investing or money management services. Financial apps must have the necessary documentation and licensing they need to operate in the respective regions. If they don’t, they don’t get approved.
The fix: Clearly evaluate the industry your app operates in and the services you plan to offer, and submit all necessary documentation during the review process. Even if you are unsure and have any specific app documentation or authorization from any institute, do provide them during the review process, as additional information can do no harm.
Now that we have looked at the most common Apple App Store rejection reasons, let’s look into how to prevent them in the first place.
Most beginners have to go through a strenuous App Store review process because they treat the App Store guidelines as an afterthought. Remember to follow the Apple App Review Guidelines when creating your app, as they help minimize the chance of rejection when you submit it for review.
Testing your app again and again might seem unnecessary when you have already put so much effort into building it, but since you have already invested so much, you might as well put a bit more into it to make sure it passes the review process. Test your app using TestFlight, run a QA session with real users, take feedback, iterate, and then submit the final build for review.
When submitting your app for review, it’s better to include all the information you can about your app in the App Review notes in App Store Connect. Describing your app’s purpose and audience, main features, and updates helps reviewers better understand what you’re offering and why users should care.
For example, if your app operates in a highly regulated industry such as healthcare or finance, providing additional documentation can smooth the review process. Providing more context to the reviewers is less likely to result in unnecessary back-and-forth questioning and speeds up the approval process.
If your app includes login- or paywall-based restrictions, it’s better to provide a demo account in the Notes section so reviewers can quickly check the app without any back-and-forth with you.
The credentials for the demo account should be valid and not expired, because reviewers might create their own account, but it’s better to provide an existing account to speed up the process.

An app rejection is not full and final because Apple has extremely strict guidelines, and passing all of them in one go is pretty hard. So, if your app got rejected for any of the app store rejection reasons, here is what you can do.
Step 1: Review the Rejection Notice Carefully
Instead of diving straight into fixing, read Apple’s rejection message to understand the exact App Store rejection reasons, and sometimes they also include what you can do to fix that.
Step 2: Fix only the Reported Issue
Don’t make any changes or updates while resolving the rejection, as it increases the likelihood of you creating unnecessary bugs in your app and getting it rejected again. Stick to what Apple flagged, and if you want to make updates to your app, you can do it later.
Step 3: Respond via the Resolution Center
Once you fix the issue, don’t just resubmit the app. Use the Resolution Center in App Store Connect and clearly explain the changes you made in response to the feedback you received to speed up the approval process.
Step 4: Request an Expedited Review if Needed
If your app update is related to a major launch, seasonal campaign, or time-sensitive release, you may request an expedited review from Apple. While accelerated approval is not guaranteed, it can move your submission to the front of the queue.

If you think your app was unfairly rejected or misunderstood during the review process, you can appeal the decision through the App Review Board.
Step 1: Open the Resolution Center in App Store Connect
First, log in to your App Store Connect account and navigate to the app review details section, where Apple explains why your app was rejected.
Step 2: Review the Rejection Guidelines
Carefully read the common Apple App Store rejection reasons and the exact guidelines your app violates. If you still feel that the rejection was unfair, you can move forward with the appeal process.
Step 3: Gather Supporting Documents
Now, you need to prepare technical documentation that demonstrates your app was misunderstood and that it follows the Apple App Review Guidelines.
Step 4: Submit an Appeal Request
Submit an appeal request through your App Store Connect account and clearly explain with documentation why you believe the rejection decision needs to be reconsidered.
Step 5: Wait for Apple’s Response
Wait for the Apple Review Team to go through your appeal and make a decision. They can choose to stick with the rejection, approve your app, or ask additional questions to fully understand it. Most appeals are reviewed within 24 hours of filing them.
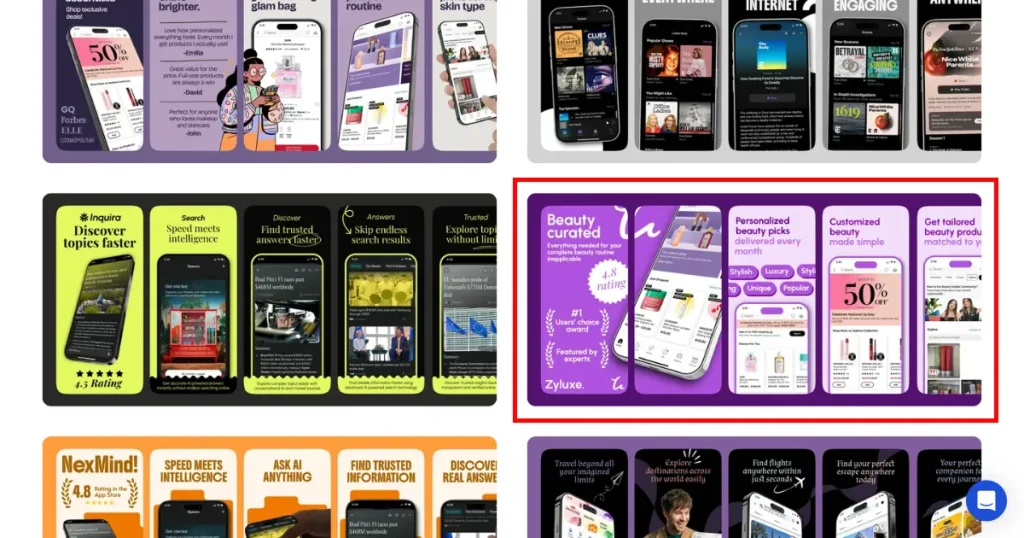
One of the most common reasons for Apple App Store rejections is not showing the actual app UI in your app screenshots or not following Apple’s design standards when designing them. So, the question arises, how to design your screenshots manually with store-compliant sizes for multiple devices, fast?
That’s where AppLaunchpad comes in. AppLaunchpad is a web-based app store screenshot generator that lets users create professional-looking, store-compliant screenshots by choosing from its massive library of 1,000+ templates.
Here is a step-by-step process for using AppLaunchpad to create app screenshots quickly.
Step 1: Create an Account with AppLaunchpad
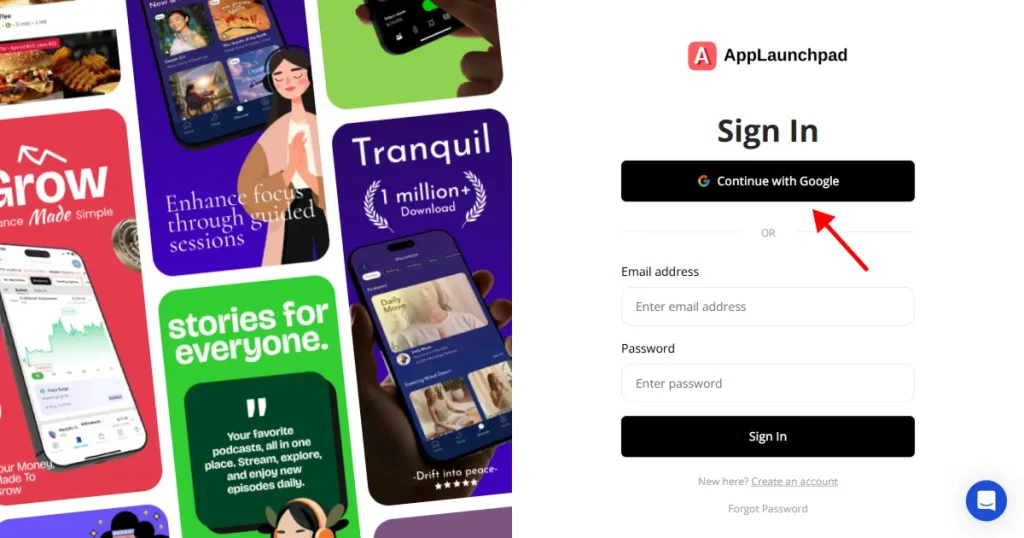
First, create an account with AppLaunchpad by entering your name and email address or using the Gmail login method, which is faster and easier.
Step 2: Select a Template
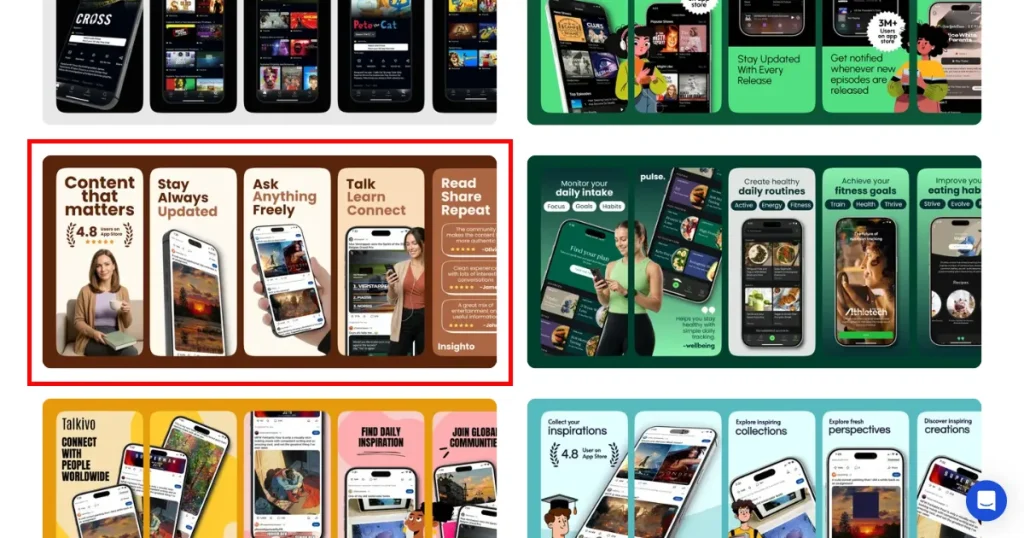
You can start from scratch and create your own unique screenshots, but for this guide, we’ll show you how to use a template to create your app screenshots fast. To do that, navigate to the App Store Screenshots library and click on any of the templates to start editing them.
Step 3: Upload App UI Screenshots
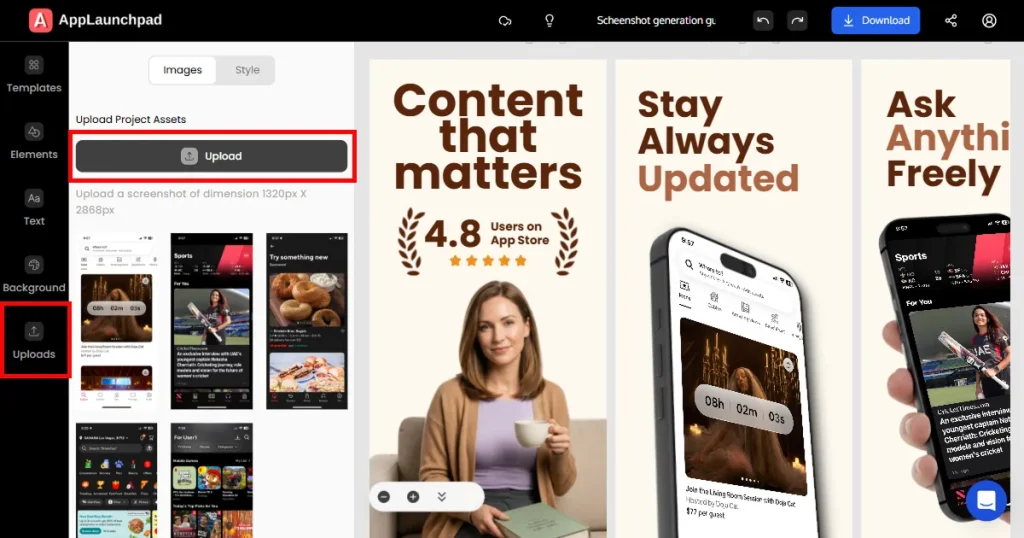
Once you’re in the editor, you can navigate to the Upload section and add your actual app UI by clicking on the Upload button. Once your screenshots are uploaded, select the device you want to apply the screenshot to, then click the screenshot, and AppLaunchpad will automatically place it on the device.
Step 4: Edit Text on Screenshots
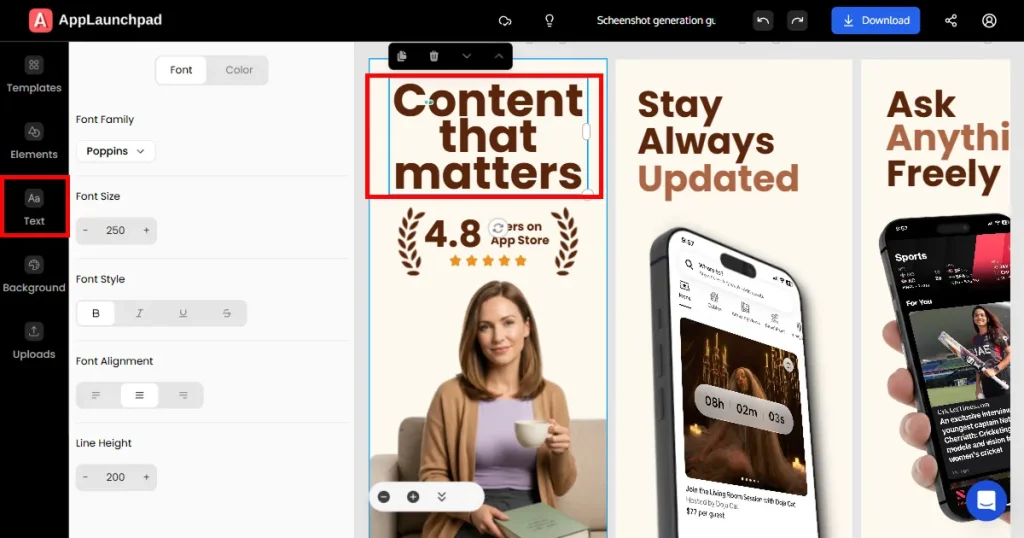
Now, you can edit your texts and captions on the app screenshots by clicking on the text box in the template, or you can add a new text box by navigating to the Text section of the editor and clicking on Add Text.
Step 5: Customize the Backgrounds
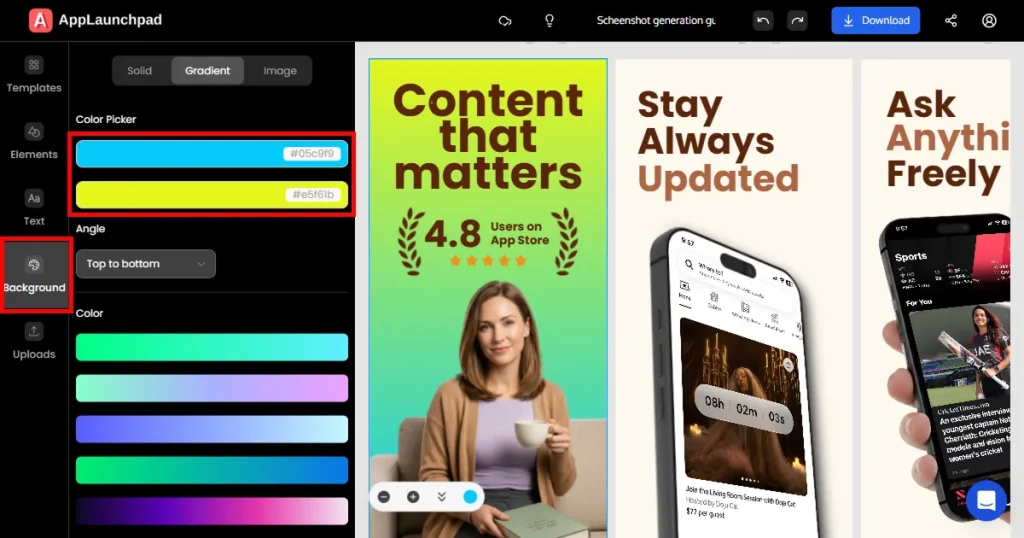
You can also change the design’s background to match your brand colors by clicking the Background tab in the editor and selecting a solid color, a gradient, or even an image.
Step 6: Add Design Elements
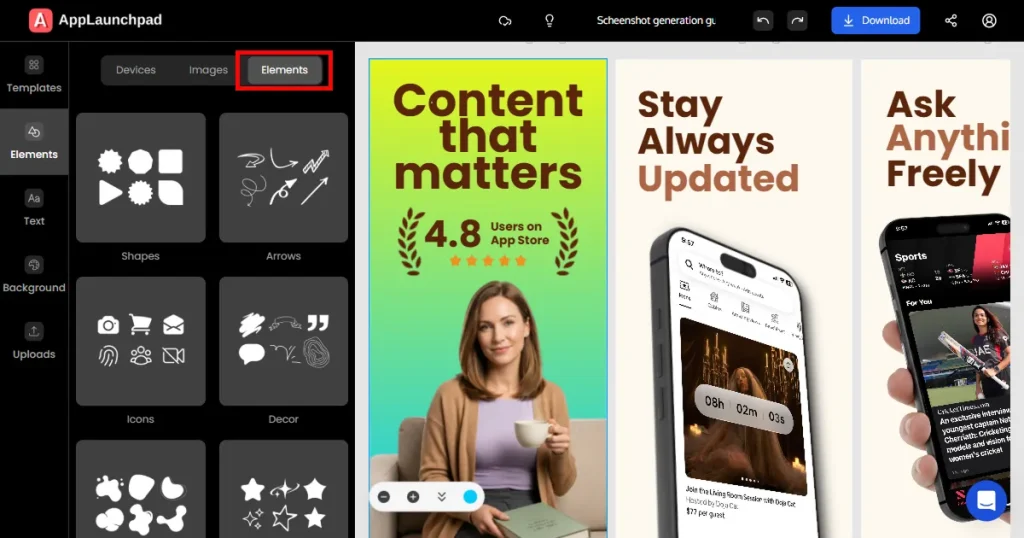
Next, you can add elements such as badges, shapes, arrows, illustrations, or devices to your app store screenshots.
Step 7: Localize Your Screenshots
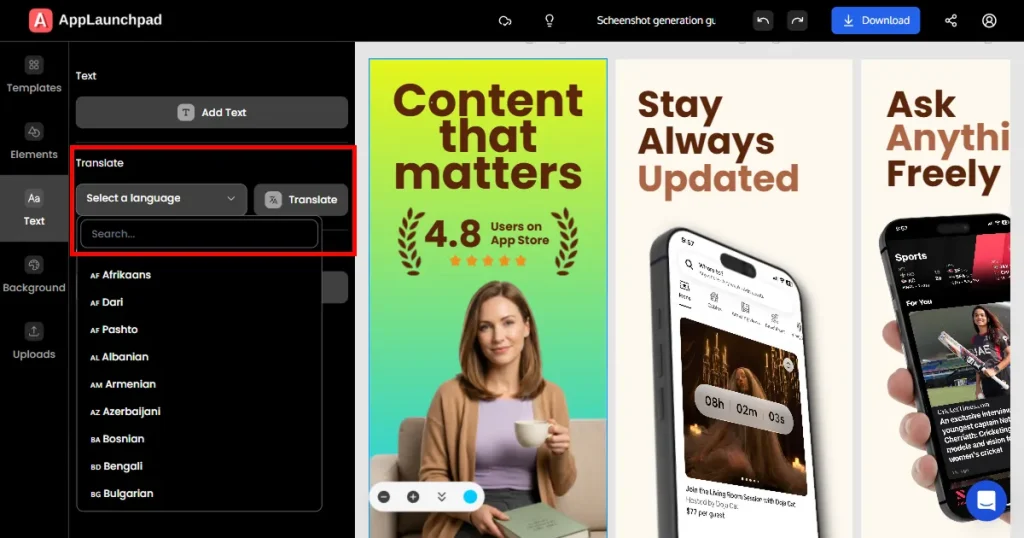
If you are launching for multiple locations, you can localize app screenshots by clicking the Text tab, selecting a language, and then clicking Translate. You can choose from 80+ languages to translate your screenshots.
Step 8: Clone Your Screenshots to Different Devices
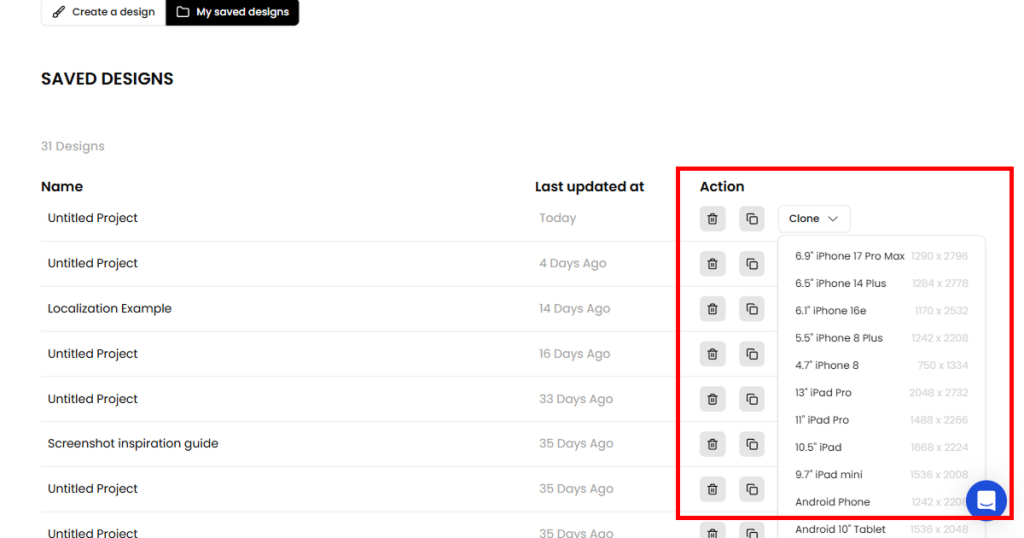
Creating a multidevice experience is crucial for a successful App Review. However, creating multiple screenshots for different devices is time-consuming. You can use AppLaunchpad to clone screenshots by navigating to My Saved Designs, clicking Clone, and selecting the exact device you want to create screenshots for.
Step 9: Export Your App Screenshots
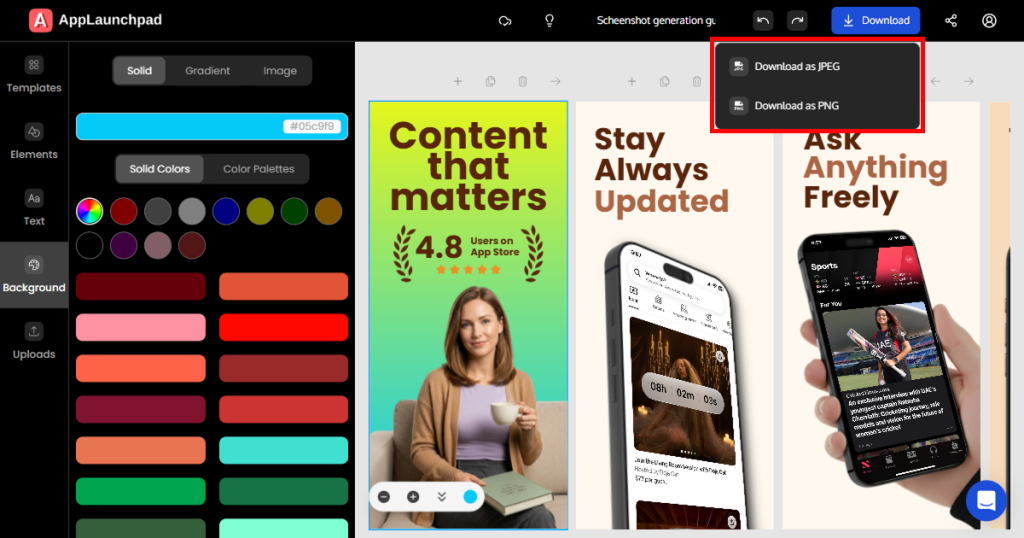
Once your design is ready, click Download, choose JPG or PNG, and export the ZIP file to upload directly to your app listing.
Apple App Store rejections are more common than you think, especially if you are a new developer. Once you receive a rejection, you can work on the feedback and resubmit the app for review. Sometimes, you might have to go through multiple rejections and back-and-forth with the review team before your app finally gets approved.
To avoid all this wasted time, it’s better to design your apps keeping the Apple App Store guidelines in mind. And using the correct tools like TestFlight for beta testing your app and AppLaunchpad for creating store-compliant screenshots, which offers more than 1000 store-compliant screenshot templates, one-click location, advanced customization, one-click resizing, and an app screenshot inspiration gallery to get inspired before you create your app screenshots.
Apple will keep rejecting your app if you don’t follow the App Store guidelines strictly. Some common Apple App Store rejection reasons are the presence of bugs in your app, misleading metadata, or privacy policy violations.
You can appeal an app rejection by submitting a request through the App Review Board inside App Store Connect by providing proper documentation and explaining why your app complies with Apple’s policies.
The Apple App Review process begins when you submit your app for review. A real human being will test your app on real Apple devices to ensure it complies with all App Store Guidelines and provide the feedback needed to fix that error and get your app approved.
To avoid rejection on the Apple App Store, thoroughly test your app, follow Apple App Review Guidelines, use accurate metadata, maintain privacy compliance, and ensure reviewers can fully access all app features during submission.
Developers often overlook inaccurate metadata, expired demo account credentials, unclear permission requests, and missing review notes.
By following Apple’s App Review Guidelines, you can avoid common mistakes that lead to rejections, resulting in faster approvals and fewer review cycles.